Deploy Agents Easily with Langraph CLI: A Practical Guide
Deploying agents shouldn't be a pain. With Langraph CLI, I've slashed my deployment time down to mere minutes. First, I set up the CLI installation with the straightforward 'uv tool install langraph cli' command. Then, I test my applications locally using Langsmith Studio, allowing for quick iterations (essential to dodge any production mishaps). After that, I spin up a new Langraph application with 'langraph new' and I'm ready for deployment. I'll walk you through how I integrated with Langsmith, managed my deployments, and used the available endpoints—all from the terminal in just a few commands. Trust me, once you experience this ease, there's no going back.
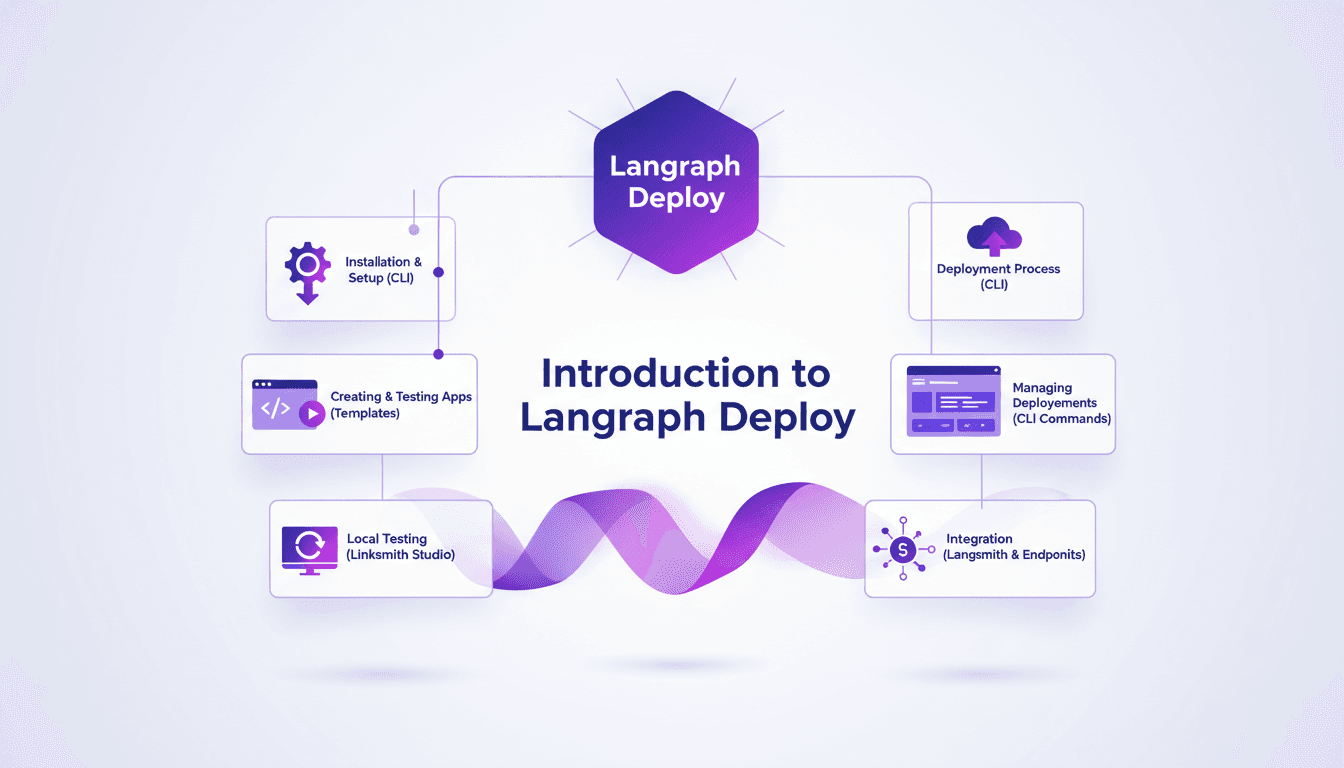
Deploying agents shouldn't be a pain—it's a process that can take just minutes if you do it right. With Langraph CLI, I've trimmed down deployment times significantly, and I'm going to show you how. I kick things off by installing the CLI with a simple 'uv tool install langraph cli' command (it's almost magical how easy it is). Then, I create a new application using 'langraph new', leveraging Langraph templates that save me tons of time. I iterate locally with Linksmith Studio, which helps me catch bugs before they hit production (trust me, it's saved me more than once). After that, deployment is a breeze straight from the terminal. Integration with Langsmith and managing deployments becomes second nature with CLI commands. It's a real game changer, but watch out for context limits—beyond 100K tokens, things get tricky. I'll walk you through this workflow that's revolutionized how I work.
Getting Started with Langraph CLI
First, I downloaded and installed Langraph CLI using the command uv tool install langraph cli. It's straightforward, no frills, and it saves me precious time. So why the CLI? Simple: it's efficient, direct, and perfect for those of us who live in the terminal. But watch out, make sure your environment variables are correctly configured from the get-go. This has saved me from many headaches down the line.
My language of choice here is Python, but be aware that Langraph supports other languages too. This is one of the many advantages of this tool, although I did get burned a few times by configuration details.
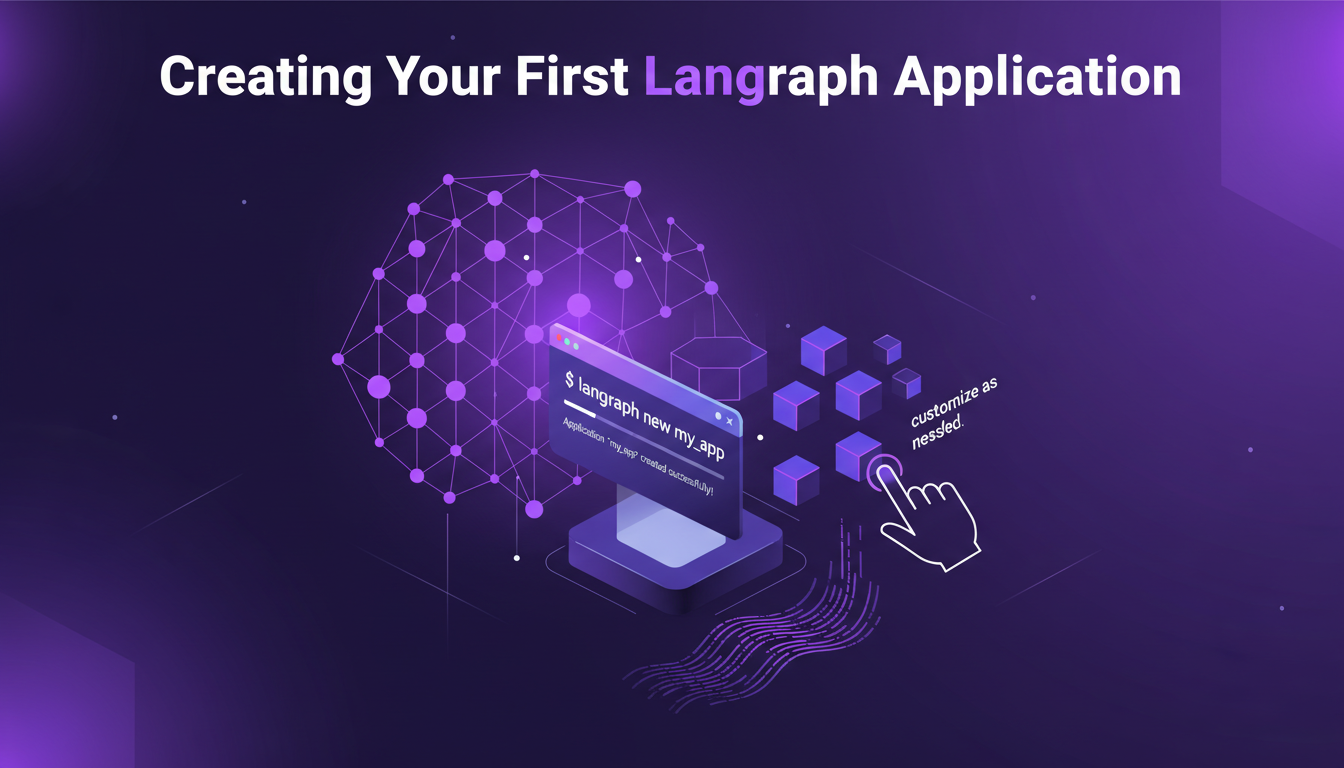
Creating Your First Langraph Application
To create a new application, I used the command langraph new. It's a real time-saver. Langraph's templates are robust and handle most of the boilerplate code, allowing me to focus on business logic. But watch out, these templates can sometimes be too generic. Customize them as needed to avoid unpleasant surprises.
Testing early can save you a lot of headaches later. I always run basic tests right after creation to ensure everything is working properly.
Key Takeaways
- Use
langraph newfor quick setup. - Robust templates but often require adjustments.
- Test early to avoid errors later.
Local Testing with Linksmith Studio
Linksmith Studio is my go-to tool for local testing. It integrates seamlessly with Langraph, which is a real plus. Local iteration is fast, I can test changes without having to redeploy, which is a game changer. But be cautious not to over-test locally. Sometimes it's faster to deploy and test in a real environment.
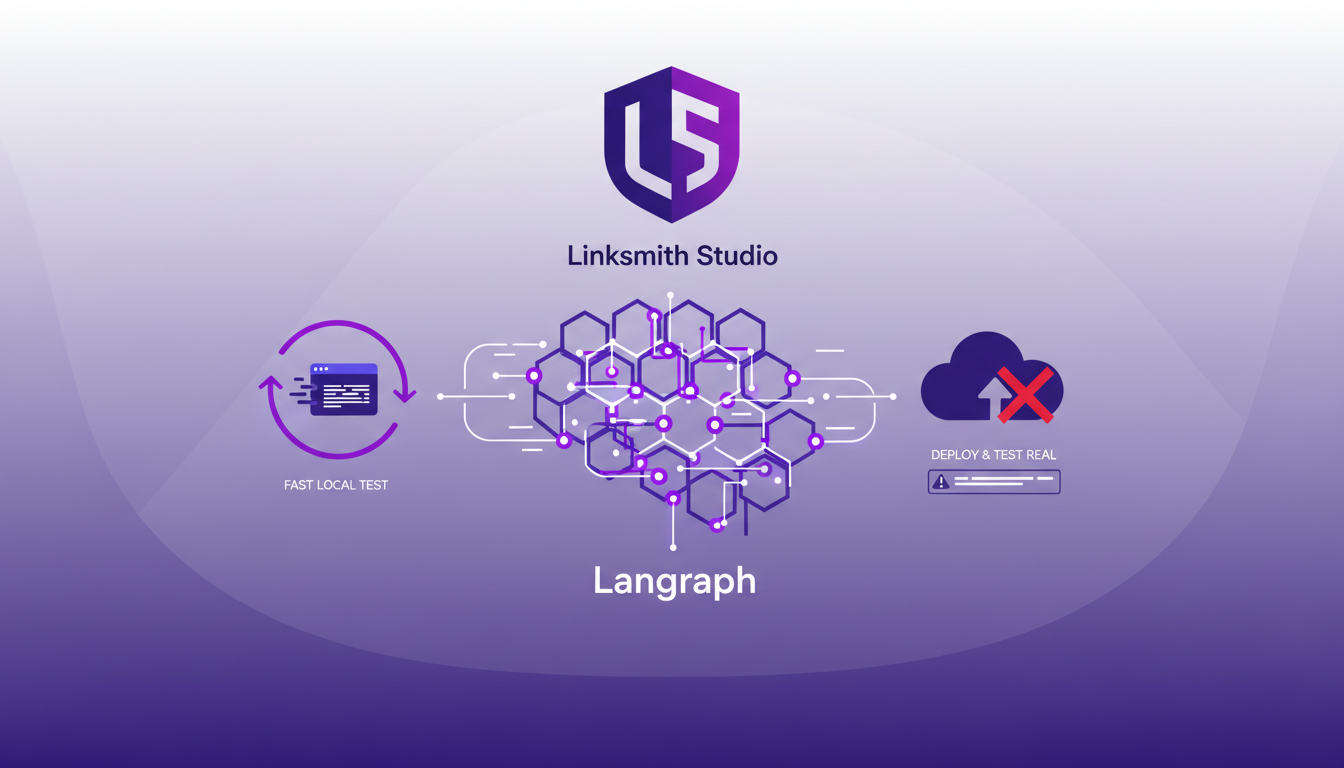
Linksmith's feedback loop is invaluable for refining functionality before going live. It's a tool I highly recommend.
Key Takeaways
- Linksmith Studio for fast and effective local testing.
- Don't over-test locally; deploy for real-world testing.
- Use feedback to refine your agents.
Deploying and Managing Agents
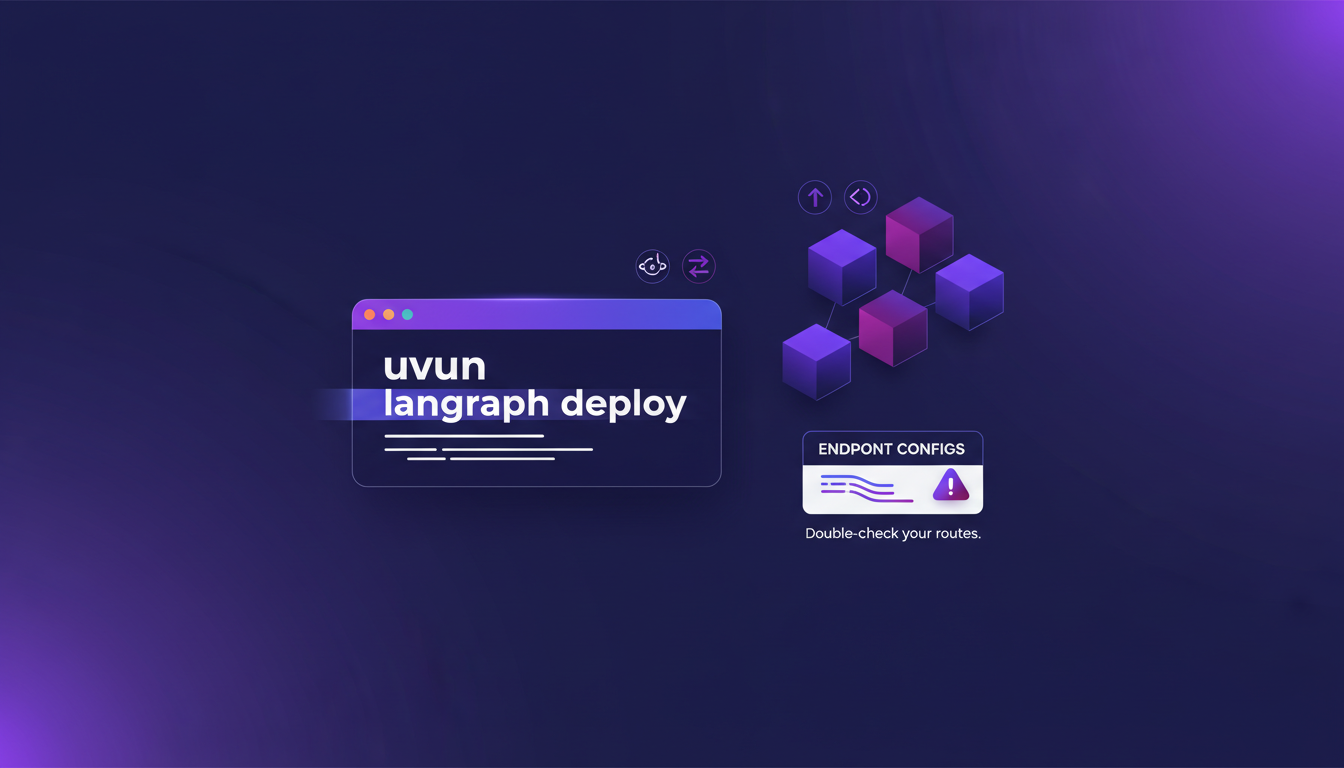
Deploying with the command uvun langraph deploy is straightforward. A single command, and you're done, reducing errors. Managing deployments through the CLI is efficient. You can track, update, and rollback easily. However, I've faced issues with endpoint configurations. Double-check your routes!
Deployment features are rich, but watch out for API limits. Plan your usage carefully to avoid surprises.
Key Takeaways
- Simple deployment with
uvun langraph deploy. - Easily manage deployments through the CLI.
- Watch out for endpoint configurations.
Integrations and Advanced Features
Langsmith integration is seamless. It extends functionality and optimizes performance. Explore available endpoints; they can expand your application’s capabilities. But watch out, advanced features come with trade-offs. More power means more complexity. Always balance feature use with performance impacts.
If you want to delve deeper, I recommend checking resources like LangGraph CLI - LangChain Reference Docs or What is LangGraph? - IBM for a comprehensive overview.
Key Takeaways
- Seamless integration with Langsmith for optimized performance.
- Explore endpoints to expand capabilities.
- Watch out for advanced feature trade-offs.
Deploying agents with Langraph CLI has truly streamlined my workflow. From setup to production, it's a matter of minutes. Here's what stood out:
- Speed: Going from prototype to production in no time is a real game changer. It's efficient.
- Simplicity: With just
uv tool install langraph cli, I'm up and running. No complex configurations needed. - Efficiency: Creating a Langraph application using
langraph newis quick and easy. - Flexibility: Linksmith Studio makes local testing and iteration a breeze.
It's honestly a game changer for deployments, though I keep an eye on potential limits like external dependency management. Ready to transform your deployment workflow? I highly recommend giving Langraph CLI a shot today. For deeper insights, check out the full video: YouTube link.
Frequently Asked Questions

Thibault Le Balier
Co-fondateur & CTO
Coming from the tech startup ecosystem, Thibault has developed expertise in AI solution architecture that he now puts at the service of large companies (Atos, BNP Paribas, beta.gouv). He works on two axes: mastering AI deployments (local LLMs, MCP security) and optimizing inference costs (offloading, compression, token management).
Related Articles
Discover more articles on similar topics
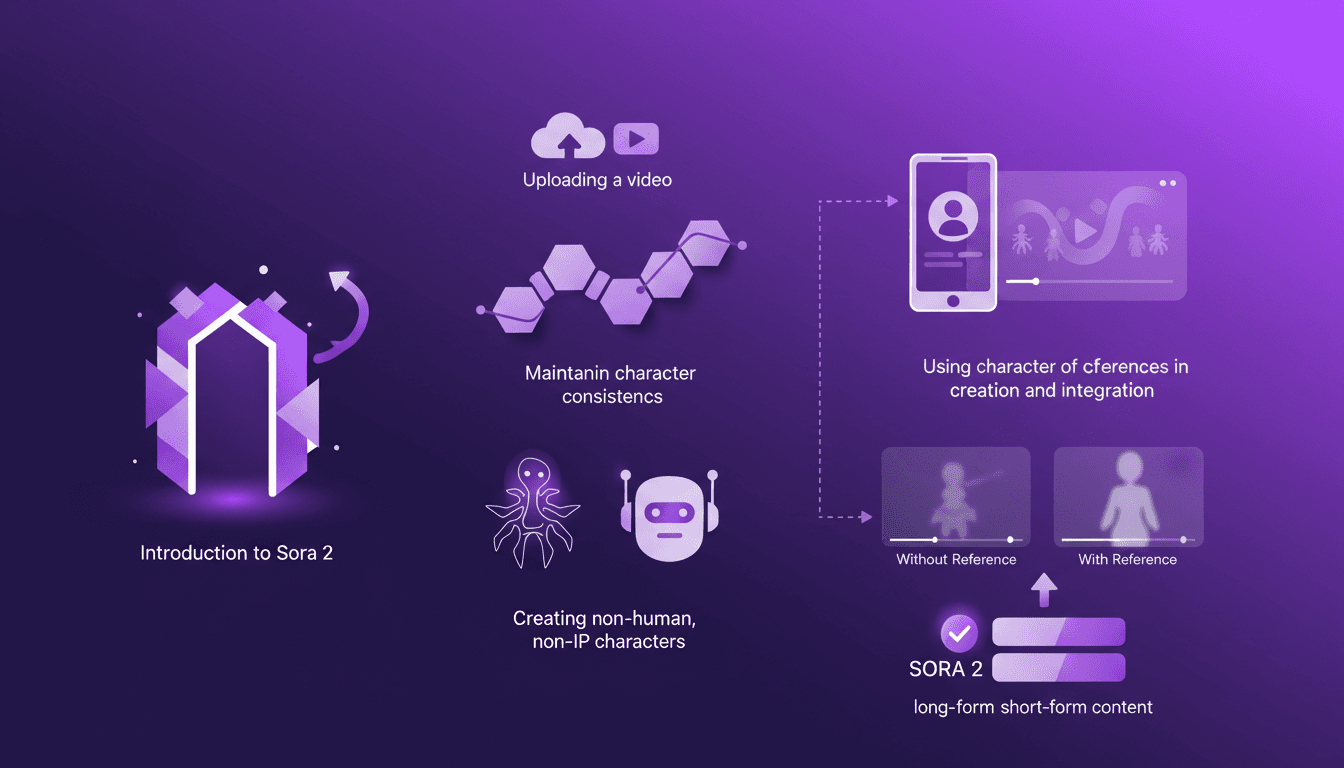
Building Consistent Characters with Sora 2
I've been diving into Sora 2, and let me tell you, the character creation functionality is a game changer for anyone serious about video consistency. You know how frustrating it is when your AI-generated characters look different in every scene? Sora 2 tackles that head-on. In this piece, I’ll walk you through how I use Sora 2 to maintain character consistency, even when creating non-human, non-IP characters. We’ll explore the workflow from uploading your initial video to seeing the final consistent output. I’ll demonstrate character creation and integration, and compare video outputs with and without character references. Sora 2 is a major asset for long-form and short-form content. Buckle up, this is hands-on.
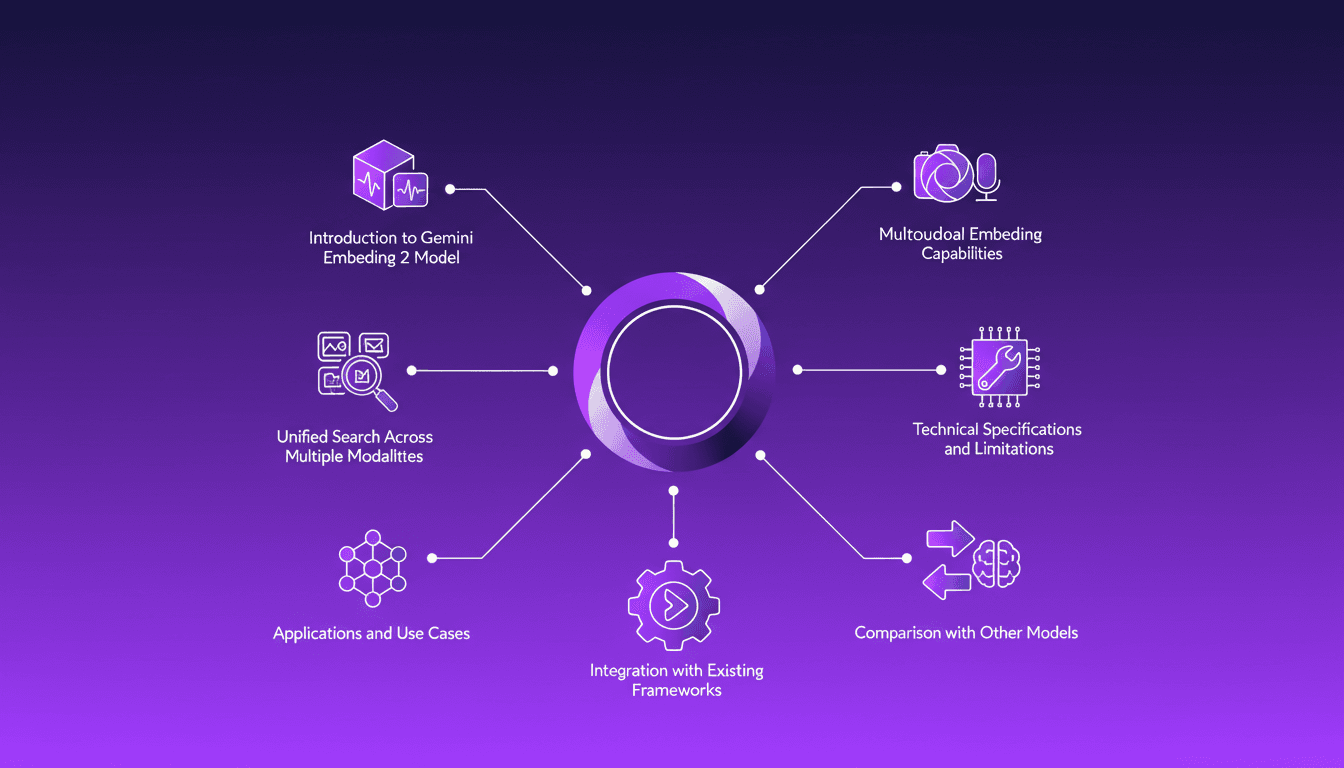
Integrating Gemini Embedding 2: A Practical Guide
I dove into Gemini Embedding 2 to streamline how I handle audio, text, images, and videos. Imagine this: a unified approach to multimodal embedding that actually delivers. I put this promise to the test myself, and trust me, there are critical nuances you'll need to leverage its full potential. Whether you're looking to unify your searches across multiple media types or integrate this model into your existing frameworks, this practical guide will show you how. Be wary of some technical limitations that might catch you off guard, but with the right orchestration, the results speak for themselves. Let's dive in, and I'll show you how I've integrated it into my workflows for direct, measurable impact.
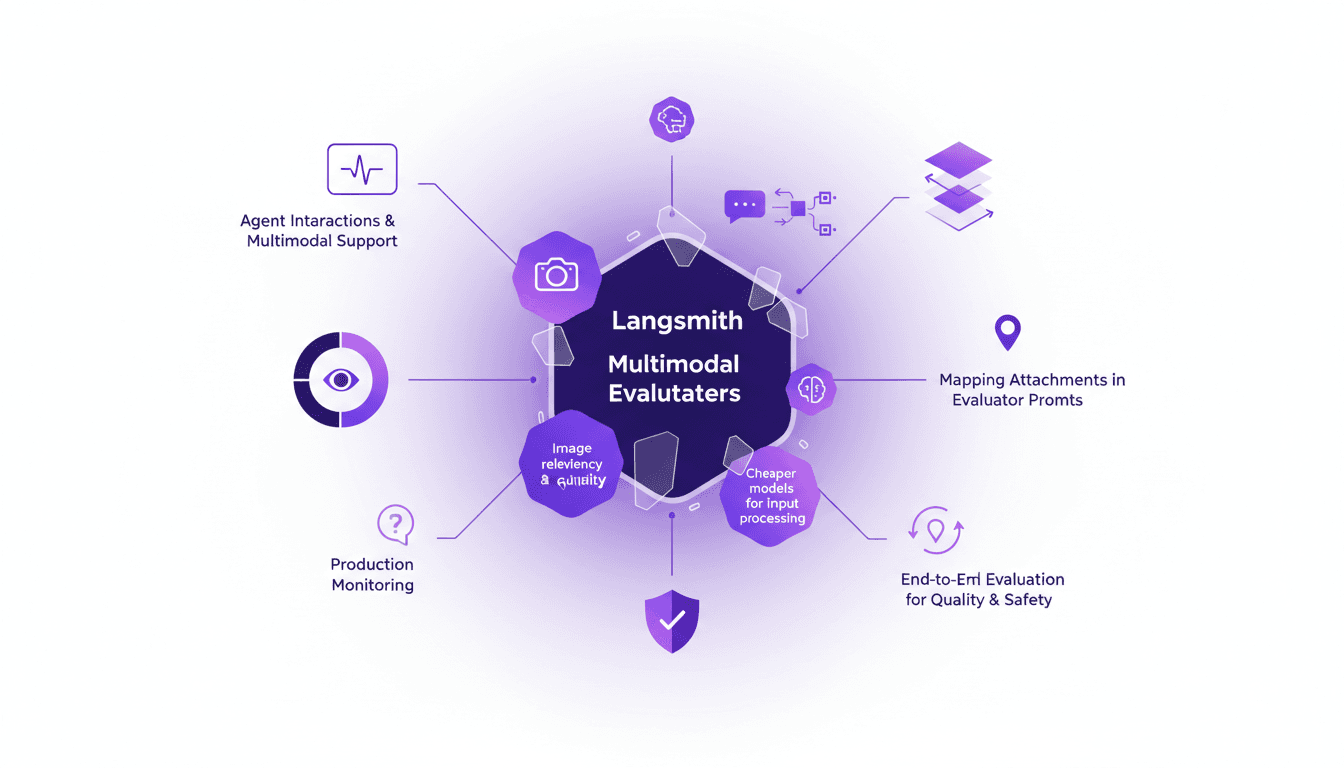
LangSmith Multimodal Evaluators: Practical Integration
I've been tinkering with LangSmith's latest feature—multimodal evaluators—and it's a game changer for agent interactions. First, I integrated the B64 format to handle images, then evaluated the relevancy and quality of interactions. But watch out for cheaper models, they can sometimes skew results. The integration is a real challenge, but once mastered, it enables smooth production monitoring and end-to-end evaluation of interactions to ensure quality and safety.
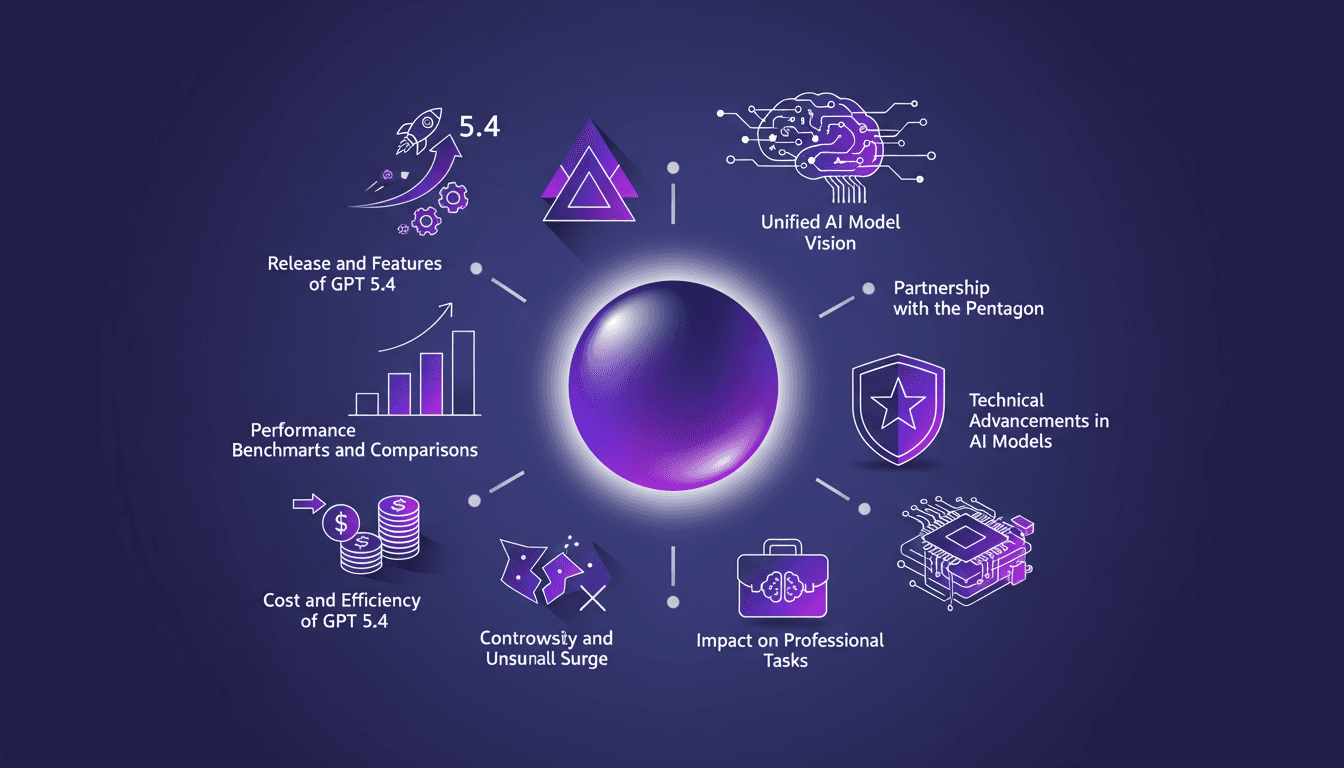
GPT 5.4: Performance, Cost, and Controversy
I just integrated GPT 5.4 into my workflow, and let me tell you, it's a game changer—but not without its quirks. OpenAI has just released GPT 5.4, and between boosted efficiency and cost management, it's a complex terrain of trade-offs. Priced at $15 per million tokens, it looks tempting, but watch out for the 295% surge in uninstalls on February 28th. Scoring 83% on the GDP val benchmark, surpassing Opus 4.6, GPT 5.4 promises a lot, but beware of the pitfalls. Let's dive into the technical details and potential professional impacts this new version might have.
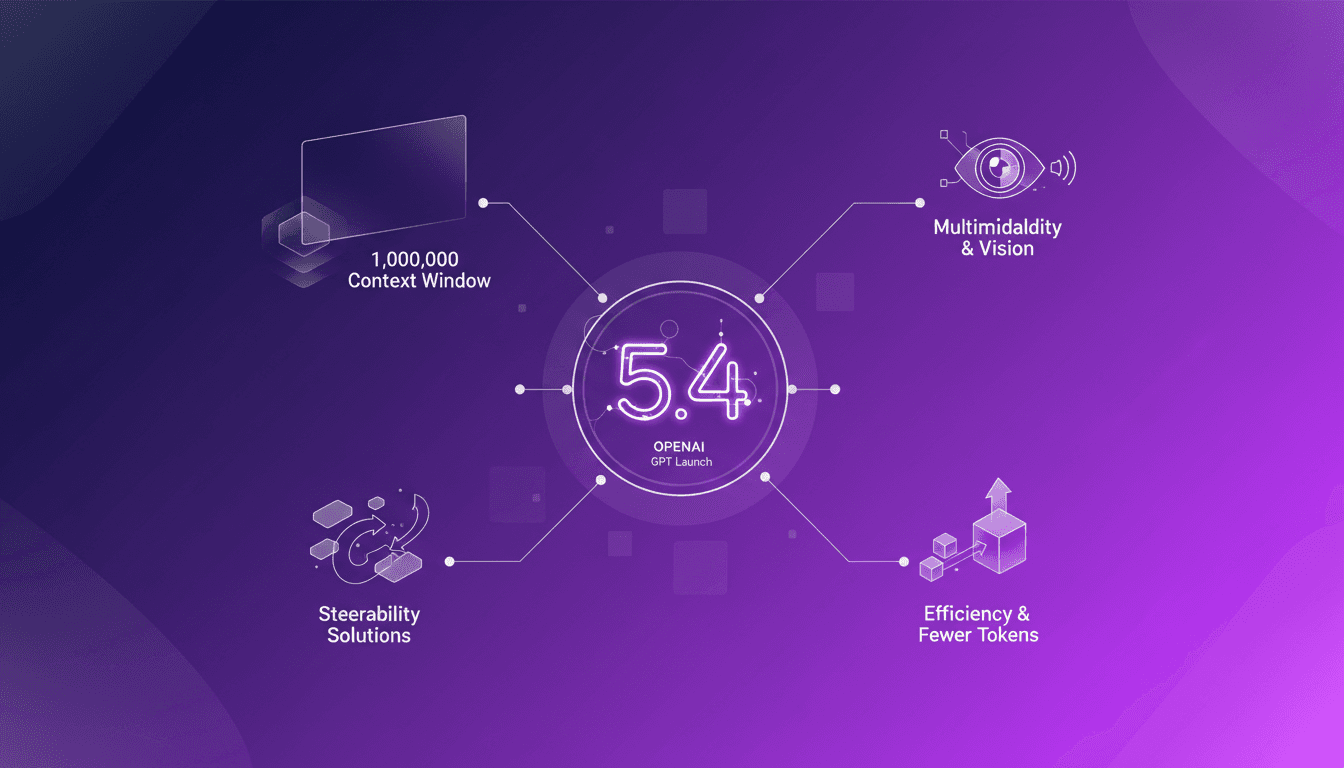
GPT 5.4: Context Revolution with 1 Million
I've been in the trenches with AI models for years, and let me tell you, the launch of GPT 5.4 is a game changer. This model promises a massive leap with its 1 million context window, enhanced multimodal capabilities, and solutions to the notorious steerability problem. But before you dive in headfirst, let's break down what this means for us builders. Imagine orchestrating a project where context isn’t a crushing limit anymore, where vision and text blend seamlessly. GPT 5.4 isn’t just a simple update; it’s a reinvention of the wheel, but watch out for the usual pitfalls: don’t overload your project with promises without understanding the constraints. Let's explore these new features and see how they stack up in real-world applications.